Mounting a power strip to your desk is one of the best places to start with cable management.
Once you have a strip mounted to your desk, all of your powered desk accessories have a short trip to their power source. That means fewer cables traveling around resulting in a very clean look.
This makes up one of the main sections in our article specific to hiding wires under your desk. Mounting a power strip under your desk is especially true for standing desk cable management.

Today we’re going to show you five different ways you can mount your power strip under your desk. You only have to choose one of these methods depending on your situation.
Whether you have a glass desk, small desk, or low-profile desk, one of these methods will work for you. You don’t have to screw a power strip into your desk if you don’t want to.
Let’s get started!
Key Takeaways
Here’s a quick summary of the methods you have to choose from.
- Double-Sided Tape – this is the most popular option because it’s fast and requires zero tools.
- Adhesive Back Velcro – using a high-load rated hook & loop strip keeps things adaptable.
- Cable Management Rack – this is if you want an all-in-one solution for all cable management.
- Screw Mount – if you need a completely rigid mount to your wood or MDF desks, use screws.
- Clamp-on Power Strips – if you want a plug-and-play power strip, clamp-on strips are available.
Keep reading for the nitty gritty details and specific recommendations that I’ve tried myself.
5 Ways To Attach Your Power Strip Under Your Desk
1) Double Sided Tape
First up is the method I’ve used multiple times in the past: using some double-sided tape. Not just any double-sided tape will do here. We need a high-strength double-sided tape that has a decent thickness.
3M is always a good choice for high-quality adhesives that hold very well. They make foam double-sided tape which conforms to your surfaces very well too.

Strong double-sided mounting tape, holds up to 3 Ibs per 2 inches. This industrial-strength foam tape is easy to install, just peel off the tape and stick it to the surface of the object. It bonds quickly and securely when it’s fully compressed. No drilling, no screwing, no heating.
Thick & flexible double-sided tape like this does not require a perfectly flat surface. This results in a stronger hold on your power strip because the back of a power strip is rarely perfectly flat.
There are all kinds of text and protrusions and holes on the backside of a power strip. Thick double-sided tape can conform to these types of surfaces very well.
Be sure to choose an option that is as wide as the base of your power strip. A one-inch thick tape, like the one linked above, is a good option.
Advantages & Disadvantages of Double-Sided Tape
Advantages
There are a ton of advantages to using a double-sided table to attach your power strip to your desk. First and foremost, no drilling is required.
Drilling is just not an option for some desks. If you have a glass desk or a desk with a thin plastic top, drilling is the last thing you would want to do.
If you do have a glass desk, we have a dedicated article on perfecting glass table cable management.

Even with a wood desk, drilling can be risky. You can accidentally drill through the entire desk giving you a gaping hole.
There is also the risk of accidentally drilling in the wrong location. That would result in you having to drill another hole once again!
Disadvantages
The downside here is that this high-strength double-sided tape can be pretty strong. It won’t be a quick job to relocate your power strip if you end up not liking the location you chose.
When you do get it removed, you will likely have a bit of tape residue on both your desk and your power strip. Taking that residual material off can be a hassle.
If you are a “measure twice, cut once” type of person, and will know exactly where you want your power strip mounted, this is a terrific option.
How To Install a Power Strip With Double-Sided Tape
Here are the steps you need to follow to attach your power strip under your desk using double-sided tape:
- Clean & dry the mounting area on your desk
- Clean & dry the backside of your power strip
- Cut double-sided tape to match the length of your power strip.
- Apply one side of tape to the back of your power strip, and apply pressure.
- Remove the protective film on the other side of the tape. Locate and press the power strip onto the mounting location on your desk.
- Add pressure for 15-30 seconds.
Many of these 3M foam adhesive tapes get stronger after a day or two. If you have a ton of heavy power cords to attach, let it sit for a bit before connecting all your devices.
2) Adhesive Back Velcro
There is another adhesive back option on this list: adhesive back velcro! This is very different from double-sided tape.
Adhesive back velcro is a hook and loop material that can be mounted to any surface. In this case, we will want to mount this under our desk to hold our power strip.
Similar to double-sided tape, the strength of velcro will be important here for this to work successfully.
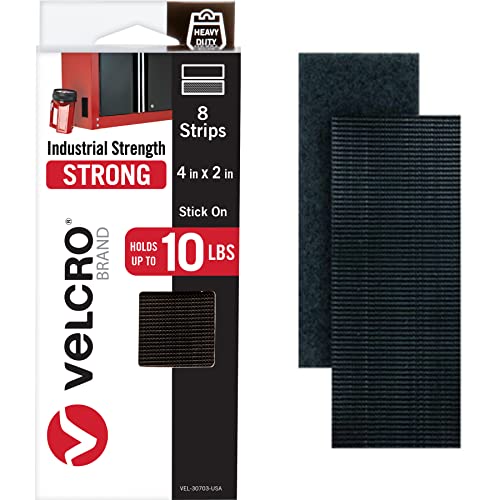
Industrial strength VELCRO Brand strips feature a special sticky back adhesive to provide a secure and long-lasting hold. No hammer, drilling, or nails are necessary, industrial strength VELCRO features an easy peel-and-stick application.
The velcro linked above is a nice and thick 4-inch by 2-inch strip that can hold up to 10 lbs, each! That is plenty strong for a power strip and connected power cables.
Advantages & Disadvantages
Advantages
Velcro is special because it is not as permanent as a solution like heavy-duty double-sided tape. Velcro gives you a ton of positional flexibility.
If you like the idea of fine-tuning your power strip location, velcro gives you that option. Velcro can help make your entire cable management system very modular.
You can line the entire bottom of your desk with this type of velcro using long strips like this:
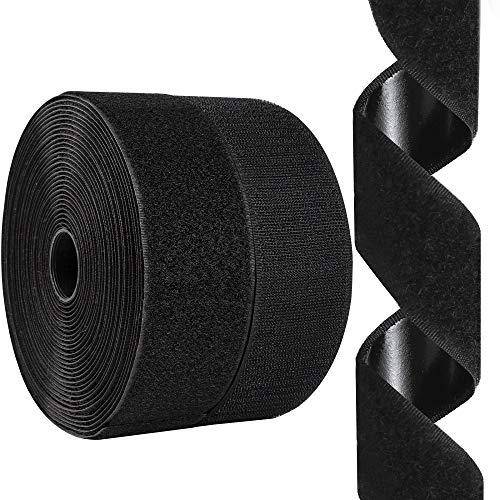
This 26 feet self-adhesive hook and loop tape is made of soft nylon and can be applied on any smooth surface with its coated high-quality waterproof glue. It is easy to install and provides powerful clamping force for heavy-duty applications.
You can turn the bottom side of your desk into a hook-and-loop canvas where you can mount anything that has velcro on it! This can be a game changer for modular cable management.
Simply slap some velcro on a power brick or an excess cable bundle and stick it under your desk!
Disadvantages
Where you are a little more limited with velcro is the holding strength. Hook and loop fasteners are not as strong as 3M foam double-sided tape.
However, they are more or less strong enough to hold a power strip. If you have super-heavy power bricks that attach to your power strip, be sure to use one of the high-strength options we recommend.
How To Install A Power Strip Under Your Desk With Velcro
- Clean and dry the areas you plan to stick the adhesive back hook & loop tape. This should be the back of your power strip and the underside of your desk.
- Apply the hook side of the velcro to your desk and add pressure.
- Apply the loop side of the velcro to your power strip and add pressure.
- Stick the hook side and loop side together and add pressure.
I’ve done this method in the past and it works great! Below is an image of a long strip of adhesive back velcro attached to my desk.

3) Cable Management Rack
Cable management racks should be seriously considered here, as they are an essential cable management accessory.
Many people have created extremely clean setups by simply placing their power strips in a dedicated cable management rack.
These racks can attach to your desk in multiple ways. If you don’t want to drill your desk, you can use the double-sided tape we talked about earlier instead. There are also clamp-on cable management racks available.

This Cable Management Tray is a sturdy and durable solution for organizing unsightly data cables, power cords, outlet strips, and power supplies. Its open-wire design allows you to thread cables through the panels of the tray and even weave excess cords between the wires. The tray clamps directly to your desk's top surface or frame without any drilling

This all-purpose cable management tray is ideal for organizing cords and wiring from PCs, monitors, and peripherals. Its discrete, low-profile design can hold up to 8 lbs and can be mounted out of the way to save legroom and improve visual aesthetics. The strong and sturdy design won't drip, sag, or fall even while managing multiple outlets, and no drilling is required for installation.
If you are able to drill your desk, that will be the sturdiest solution for very heavy management loads.
Advantages & Disadvantages
Advantages
The best part of a cable management rack is that it is not limited to only holding your power strip. It is an all-in-one cable management solution!
If cable management is your end goal here, and you have some space under your desk towards the back, this might be the ideal solution for you.
Cable management racks allow you to tie down anything to the rack itself. This includes power strips, excess cable bundles, power bricks, and anything else you need to be held away from sight.
Disadvantages
Racks are not as low profile as the adhesive solutions we mentioned before. The adhesive solutions like velcro and double-sided tape put the power strip right up against your desk.
These racks hang down a bit from your desk, and the power strip is placed inside of it. If you really need to hide your power strip from all angles, this may not be the stealthiest option.
4) Screw Mount
Alas, this had to be one of the options on this list. After all, power strips are by default compatible with this method.
Most power strips are ready to go with keyhole mounting holes. They also come with a set of screws and it’s a pretty solid way to install your power strip.
I recently installed my 12 outlet surge protector with screws under my Flexispot standing desk.

Advantages & Disadvantages
Advantages
This is a very secure way to install a power strip. No extra hardware is needed if your power strip comes with screws.
If you can’t find the screws that came with the power strip, a local hardware store will have these available for cheap.
This might be the most economical option if you already have a power strip and don’t want to spend much money.
Disadvantages
Because some power strips are installed by sliding them in the direction of the slot, you can never slide the power strip in the opposite direction. If you do, the power strip will fall off of the mounting screws.
If you purchase a more industrial power strip, they will have screw holes on the sides which will be more secure
Also, you do have to drill your desk for this one. Be careful and understand the risks here.
I always check how deep my screws are relative to my desk, and get a visual of where this is on the drill bit. This way I always know when to stop drilling.


How to Install A Power Strip Under a Desk Using Screws
I use the painter’s tape method as a guide to drill the proper hole locations. You simply lay your power strip upside down, and apply some painter’s tape spanning from one screw hole to the next.

Then you mark holes at the location of the screw holes. Now we can remove the tape and place it in the install location under our desks.

I like making the tape the full size of the power strip. This helps you nail the correct location. Now we’re ready to drill!

In these last two images, I am pre-drilling the marked holes and then screwing in my long power strip for the final result!


This is the surge-protecting power strip that I am currently using at my desk:

- 2100 Joules of surge protection
- Flat plug fits in tight spaces
- 12 outlets & 6ft long cord
- Metal construction
- Outlets are pretty close together
If that wasn’t clear, check out this quick 1-minute video that illustrates how to use the masking tape method!
5) Easy Clamp Power Strips
The last item on this list is for those of you who want the simplest of solutions: clamp-on power strips.
With these unique power strips below, you simply loosen the power strip clamp and tighten them to your desk. It literally takes seconds to attach your power strip to your desk. It really doesn’t get any easier.
The below options are two very popular configurations of this system.
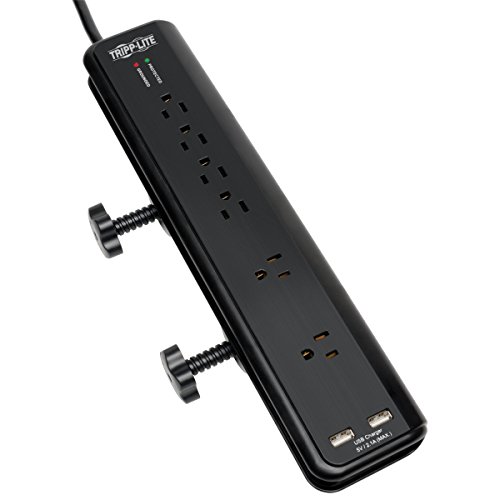
This surge protector has six total outlets, including two that can accommodate bulky transformers and two USB charging ports (2.1 amp total) for charging smartphones and tablets. It also features adjustable mounting clamps that can easily attach to desks for better accessibility to connect plugs.

This desk clamp power station slides on to your desk ledge, provides surge protection, 6 outlets, and 4 USB charging ports (4.8A total). It also has a 6-foot power cord with a flat-end 90-degree space-saving plug and is backed by a lifetime warranty.
Advantages & Disadvantages
Advantages
The biggest advantage of this system is the ease of installing and uninstalling the system. There is no drilling, taping, cleaning, or anything required to use this solution.
It really is the simplest mounting solution of them all.
Some of these options also give you the convenience of USB ports that face you on top of your desk. All while hiding the plug points underneath your desk.
Disadvantages
The cons here include having to buy a new power strip if you have a perfectly good one at home.
Also, because these clamp on the edge of your desk, you will see the clamping parts of the power strip on top of your desk.
If you don’t want any trace of a power strip mounted under your desk, this may not be the best option.
Before You Go
If you use power strips a lot, check out our article on whether you should use cable management boxes or not.