Upcycling all types of furniture has become very popular lately. Upcycling is when you reuse, restore, and improve older furniture that otherwise has little value.
Today we’re going to specifically talk about how to upcycle desks for our workspace! If you’re looking for a fun DIY project that can transform your workspace or even flip, keep reading!
We’re going to talk about the advantages of upcycling your desk, and what steps to take for a full restoration and improvement! We also have a simplified approach if you are looking for a quick improvement!
Why We Should Upcycle Desks
There are a ton of advantages to upcycling a desk instead of just tossing it and buying a new one.
Reusing Desks Results In Less Waste
Reuse is one of the three R’s of recycling. Reduce, Reuse, and Recycle.
We are always buying new things, whether it’s a new phone or some new clothes. This of course creates a lot of waste as things just go into the trash after they’ve reached the end of their life.
Any chance we have to reuse items instead of tossing them is a good path to pursue. Just reduce the waste out there.
It’s not always realistic, but for a desk and most furniture out there, it is very doable and we will show you how!
Fun DIY Workspace Transformation Project
DIY projects are the best if you have time for them. They take a bit longer and need a lot more effort.
However, they create a huge sense of accomplishment once you complete your project. You connect more with your DIY projects than a random purchase off Amazon.
It’s a super satisfying feeling to also have your vision for a project come to life! With upcycling, we get to have this fun DIY experience.
We also get a fully custom end product unlike anything else in the world. It will really be one of a kind.
Budget Friendly
You know what you don’t have to buy when you upcycle a desk? A whole other brand new desk!
Upcycling a desk means you don’t have to go desk shopping. You are instead improving your current desk with your bare hands and some tools!
Unless you are making very significant changes, it’s highly unlikely upcycling will cost more than a new desk. Save that cash with upcycling instead of buying new!
Resell For Profit
Upcycling desks well makes them worth way more than they were originally. This means you can actually improve a desk and sell it to make some money!
It could be a nice side hustle if it’s something you enjoy doing. Simply go out and find really beat-up desks that need upcycling.
Lots of people believe in upcycling furniture but don’t have the time to do it themselves. They can still buy them!
Steps To Upcycle A Desk
Now let’s get into the steps to take if you want to upcycle a desk. These steps are basic guidelines and change depending on your goals.
Some desks might not have the paint to strip. Others might not have any parts to disassemble. Keep your desk goal in mind as you go through the steps.
1) Disassemble
The first step in a full rehaul of a desk is to take it all apart. That means removing any drawers, or rails, unbolting legs, unscrewing all knobs and handles, etc.
Keep track of what goes where if there are a lot of components. I like to take a video as I disassemble, so I have an easy reference to look back at.
You can also keep different screws in different containers or have a similar organizational system. You just don’t want to be confused when the time comes to put everything back together.
The goal here is to strip down your desk. We want to be able to see all the imperfections, spot all the places that need correction, and so on.
Being very detail-oriented will pay huge dividends for a project like this.
2) Strip Paint
Identify which components will need paint removal or need to be repainted. We want to strip off all the old paint and wood stains first.
Stripping old paint will allow us to see the bare material. Chances are if you are upcycling something, any paint on the desk is probably beat up anyways.
Also, if you have a painted wood desk, this gives you the opportunity to transform your desk to have a beautiful wood finish!
Here is a popular paint stripper recommended by most upcyclers.

3) Sand And Correct Imperfections
Now that we got all unwanted paint out of the way, we can start correcting!
Right now is our chance to get rid of deep scratches, smooth out rough surfaces, and fill in holes.
The video below goes into detail on how you can sand and correct a really rough table. They show you how to strip, sand, and correct gouges on a wood table.
They even have a pretty advanced method of getting rid of ink stains that have soaked through the wood grain!
4) Replace Unrecoverable Parts
The next step is to replace parts that are too beat up to be recovered.
It would be great if we could fix everything on any desk that came our way. Sometimes though, the damage is too great.
An example would be a wood that has rotted away, or metal table legs that have been rusted to oblivion.
Your desk will look better and last longer if you swap out those defective parts with new ones. You can build them from scratch, or find a close enough replacement off the shelf.
You can also reinforce the desk to make it more stable. This is important if you plan to use a desk on a carpet. Check out our article on stabilizing desks on carpet to nail this from the beginning.
5) Re-Paint & Re-Protect
Now comes the fun part! Painting your desk. You want to plan this step out beforehand.
Think of all the possibilities. Two-toned designs, subtle graphics, etc, you’re limited by your imagination here!
Find some color combinations that go with your room, and also find some hardware that matches. It would be a shame to paint your desk just to find out that you can’t source hardware of the right color.
If you like a wood finish, find an oil or stain that gives you the desired color!
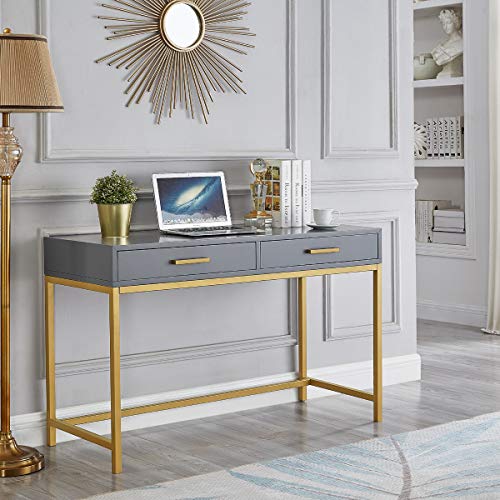
Here are some good-looking desks for some color and hardware inspiration:

Once you are ready to paint, check out this video on how to get a super smooth paint finish.
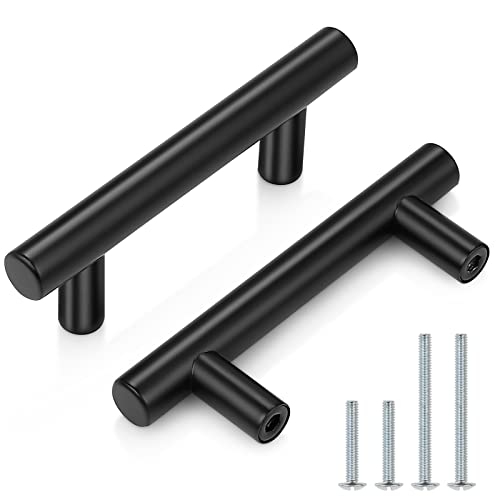
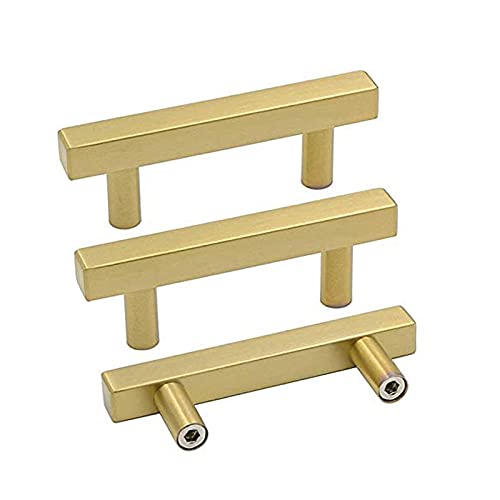
6) Add New Hardware
New hardware is almost as exciting as new paint. Hardware can refer to pretty much anything on your desk.
If your drawers don’t slide smoothly, you can buy new rails. Ugly handles? Replace them!
If you want a modern touch, get modern hardware. If some of the nuts and bolts are old and rusty, swap them out!
The hardware details really make an upcycled desk shine. Here are some examples of useful hardware.
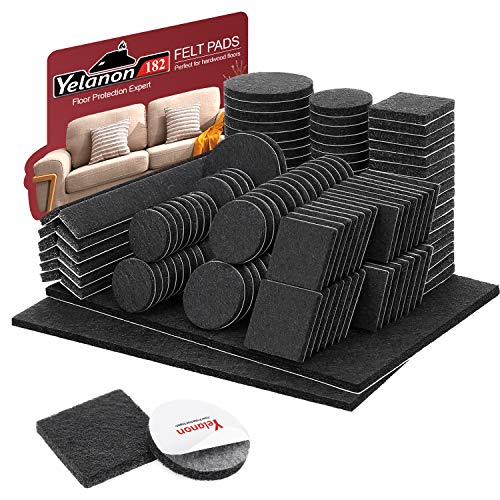
7) Finishing Touches
We’re almost done with our upcycled desk. So far we’ve removed the original finish, sanded and corrected the surface, repainted, and swapped hardware!
We could be done at this point, but there are a few nice touches we can add as a bonus.
Finishing touches include nice-to-haves, like felt pads below your desk legs. These are not necessary, but protect your floor if your desk legs are abrasive.
You can also add a functional feature to your desk, like a headphone attachment, a backpack hook, or even a cable management rack.
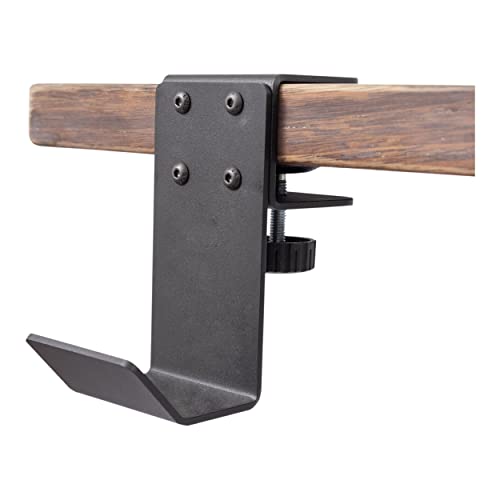
These are all great finishing touches that go the extra mile with an upcycled desk.
Do You Have To Do All Of Those Steps?
Absolutely not. You can make a huge desk transformation with only one or two of these steps.
For example, simply repainting your desk alone might give you a good enough result that you would be happy with.
Or simply stripping, sanding, and repainting your tabletop alone might do the trick.
You will have the best sense of what needs to be improved at your desk. This could mean you only need one step or several.
I will say though, that the 7 steps we just listed will give you the best result compared to only doing one or two. The result will be proportional to your effort depending on what you start with.
Upcycled Desk Ideas
Here are more great resources and walkthroughs that will help when upcycling a desk. I love seeing what others have done to upcycle their desk, as it always gives me even more ideas.
Desk Makeover 1
Guide To Upcycling And Flipping Desks
Desk Makeover 2
https://interiorsmadebeautiful.com/diy-home-decor-project-old-wooden-desk-upcycled/