Clamp on keyboard trays have a ton of benefits. It’s no wonder why they are so popular on Amazon.
If you have a thick desk however, you’ll find it hard to actually make one work.
Like with most of these “desk clamp” type products, they only support desks up to 2 or 3 inches in thickness. This can be pretty annoying if your desk is 4 inches thick or more.
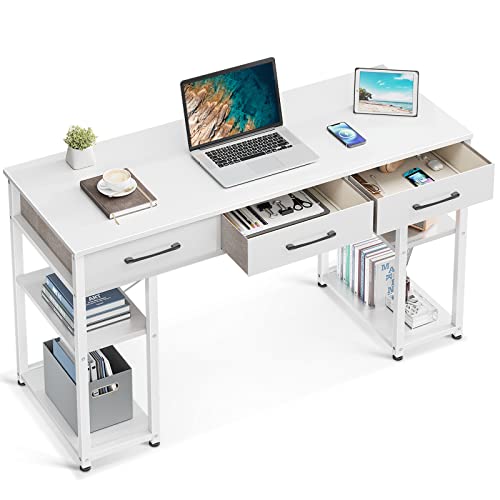
For example, desks that have integrated drawers will be much thicker than 2 or 3 inches. Here’s an example:
Don’t give up just yet though!
In this article we’re going to talk about methods you can use to try and get one of these desk clamping keyboard trays to work with your setup.
Key Takeaways
- Keyboard trays can give you more space and place a keyboard in a much more comfortable position.
- Ways to make a keyboard clamp-on tray include grabbing a VESA compatible keyboard tray and mounting that to a more conveient location. Other ways include extension brackets and more.
Benefits Of Clamp On Keyboard Trays
Because some of the following methods will require a little extra motivation, let’s remind ourselves of the benefits that these handy clamp on keyboard trays have.
Ergonomic Typing Position
First of all, most desks are too tall for most people. Let me explain.
A desk is the correct height when your feet are flat on the floor and your arms are level with the table. Just like this.
According to the WorldPopulationReview.com, the average height in the USA is 5 feet and 4 inches for women, and 5 feet and 9 inches for men. If we take the value right in the middle we get 5 foot 6.5 inches.
Now if we take that height of 5ft 6.5 inches and plug it into this desk height calculator, we get a desk that should be 25 – 27.5 inches tall.

We did a little study of the average desk height, and found it was higher at 29 inches! You have to plug in 6 feet 1 inch on the desk height calculator to get 29 inches! This means most desks are too tall for the average person.
Where am I going with this?
Well chances are your desk is too tall, and using your keyboard and mouse on top of your desk is going to be a poor desk setup. This leads to pain in the wrists and awkward ergonomics.
You’ll find you can’t type for long hours.

A clamp-on keyboard tray drops your actual working height a couple of inches. This could put your keyboard and mouse at the perfect level! At least for the average person.
Some of these clamp-on keyboard trays actually have adjustable heights so you can dial in the perfect ergonomic setup.
Here is one example:
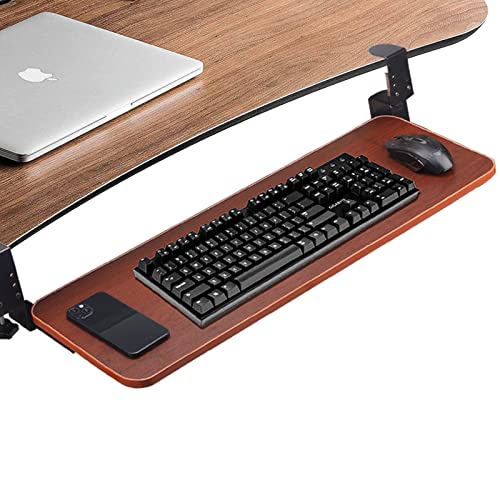
Also, if you happen to have the perfect desk height, there are keyboard trays that can extend at the same height of your desk, like this:

Frees Up Desk Space
When you move your keyboard and mouse to a new platform right under your desk, you gain a good amount of space on top of your desk.
This is great for people who have really small desks, or need to maximize available desk space.
You can probably tell that I personally like having a lot of room on my desk. It’s part of my minimalist desk setup goals. I made a guide on this minimal setup here.

More desk space gives you more breathing room, and lets you have more space to do whatever you want. Whether that’s adding a picture frame to your desk or a larger set of speakers.
Anything is possible with more room!
Stowable For A Clean Desk Setup
Most of these clamp-on keyboard trays have a ball bearing railing that allows you to slide your mouse and keyboard snugly under your desk when you’re finished.
When you’re done with your day, your desk looks ultra clean! As you saw in my desk setup above, if I hid my keyboard and mouse away in a clamp-on tray, it would have a ton more room and be super clean.
The stowable nature of these keyboard trays makes your desk look great at the end of the day.
Hidden Keyboard and Mouse Cables
If for some reason you don’t like wireless keyboards and mice, I have good news for you.
You can have the benefits of a wired connection without actually seeing any wires at your desk when you use a keyboard tray.
The keyboard tray makes you route your keyboard and mouse wires underneath your table instead of on top of your table. Therefore out of sight!
No need to charge your keyboard, change mouse batteries, or deal with any latency issues!
If you do route your cables on top of the table, check out our guide on how to hide keyboard and mouse wires. We touch on a few more methods here.
Use Clamp On Keyboard Trays On Thick Desks
Now that we’re pumped from all the potential benefits we can get from keyboard trays, let’s talk about how we can make these work.
Use Larger Capacity Trays
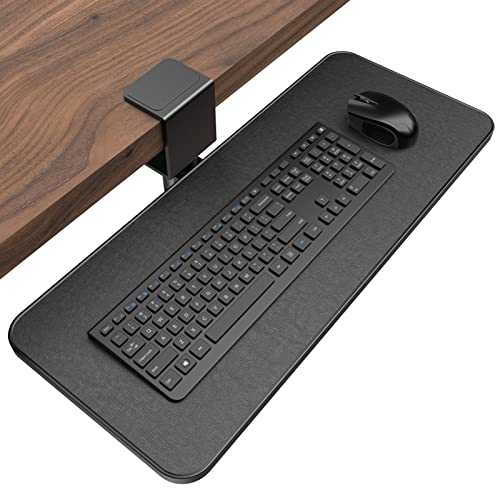
The easiest step before moving to other options and methods, is to just find the largest capacity keyboard tray clamp out there.
We’ve scoured Amazon in search of the clamp with the largest opening, and this is what we found:
3 Inch Capacity

2.7 Inch Capacity Center Clamped
3.15 Inch Capacity
It’s pretty difficult to find a keyboard clamp-on tray that supports desks beyond these desk thickness maximums.
Make An Extension Bracket
The limiting factor with most of these clamp-on solutions is that they come with a bracket that is not long enough. In our recent article talking about monitor mounts for thick desks, we dive deep into how these clamps can be extended.
The same method applies here.
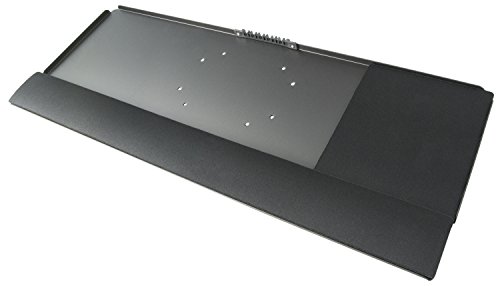
In that article, we pointed to a forum where a user actually made this extension plate. Here is a little visual on what extending a bracket looks like.

It will require a little touch of DIY, but working with your hands is fun!
You can even draw out your bracket and send it to a company like SendCutSend. They can quickly cut flat metal plates to extend your keyboard tray.
If you thought this would be expensive, think again. Their orders can be as low as $29 at the time of writing.
Clamp Anywhere With A VESA Adapter
If you are not familiar with VESA mounts, check out our article on everything you need to know about VESA mounts.
Basically they are a standardized mounting system that have a specific hole pattery which is compatible with a ton of mounting systems on the market.
Turns our there is a VESA adapter for holding your keyboard and mouse too!
This tray makes your keyboard and mouse able to be mounted pretty much anywhere that a VESA mount can go. You no longer have to depend on your desk edge right in front of you.
If you have a desk leg, or a nearby shelf that has a clampable location, you can pair the VESA keyboard tray above to a VESA arm like this:
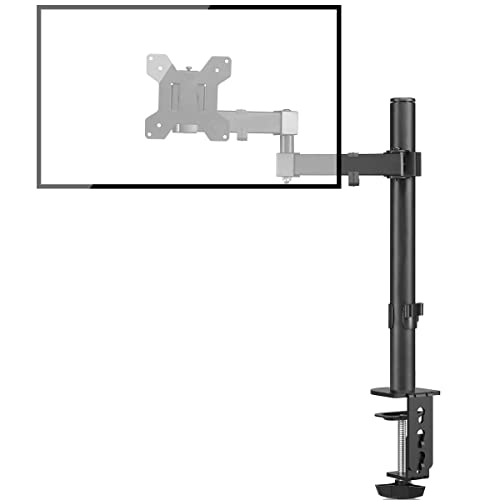
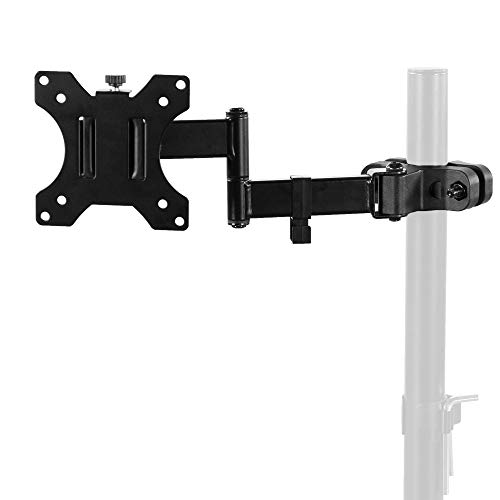
Or if you have a cylindrical pole nearby like a light stand or a desk leg, you can use a mount like this:
You still get all the benefits of a clamp-on keyboard tray. You might actually get more benefits because you no longer have those clamping plates in sight!
If you go this route, I highly recommend browsing VESA mounts on Amazon. They might all look like they were made for monitors, but they will work with the above keyboard tray adapter as well.
Find out what range of motion you need depending on your clamping location. The options are pretty limitless with the VESA system.
Remove Drawers If Applicable
Desks with drawers lead to a pretty thick desk. If you have one of these desks and this is what is stopping you, consider what your desk would be like if you removed those drawers.
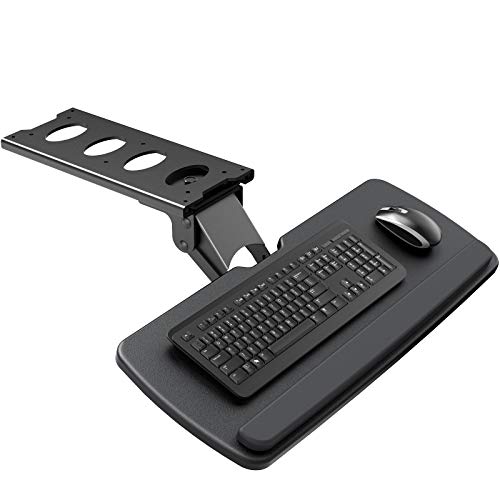
If you get a center mount keyboard tray, you would only have to remove the center drawer. Here is an example of a keyboard tray that mounts right at the center with a single clamp.
This might not be a good solution for everyone. Some desks will look awful if a drawer is missing. Others might just look like a desk with some storage cubbies!
See if your desk would work here.
Consider These Alternatives Instead
These next solutions are actually compromises. If none of the above solutions spoke to you, one of these might be worth considering.
Direct Mount Your Keyboard Tray
The nice part about the clamp on keyboard trays was the quick installation process. No drilling your previous desk or anything.
But if your desk is too thick, a direct mount might actually be the best way. You do have to be pretty sure that you will use a direct mounted keyboard tray. Consider it a permanent addition (even though it’s not).
If you decide to go this route, you get a huge benefit. You don’t have to see those ugly clamping points at the front of your desk, and you get all the other benefits too.
Your hard work installing this keyboard tray pays off as it looks like a factory included feature. You don’t see any mounting points!
Make Room On Your Desk
You might not like this solution very much, but it is the solution you can do right now for zero dollars!
I highly encourage people to try out a more minimalist desk setup. It has given me a lot better focus at my desk, and the looks make my desk so much more inviting.

Taking things off of your desk to make room for that mouse and keyboard means you don’t have to spend cash on a tray, and you can get an ultra clean desk setup. Just wanted to plant the idea that you don’t have to get one of these trays with a minimal setup, and you might be glad you didn’t.