If your desk setup is anything like mine, your laptop is your main computer. Laptops are great for portability, but you can get more productive when you pair them with an external monitor.
In this article, we’re going to do a deep dive into laptop and monitor desk setup ideas. We’ll touch on everything including the best laptop desk setups, how to get connected, accessories to make your life easier, and more!
Because my laptop has been my main computer for over the last decade or more, I’ve tried all of the setups in this list myself. You will see this as I share my various desk setups below.
I’ll dive into the pros and cons with each laptop & monitor setup so you can decide which is right for you. Let’s get into it.
Functional Desk Laptop and Monitor Setups
I split the laptop and monitor desk setups into two main categories: open laptop and closed laptop setups.
If you are content with the display real estate of your monitor alone, closed laptop setups can take up less space. If you want to use your laptop’s display, we’re going to start with open laptop setup ideas!
Open Laptop & Monitor Setup Ideas
It’s often said that more monitors lead to better productivity. This is definitely true for me when I need to reference a handful of applications while working.
Leaving your laptop in the open position with the screen active essentially gives you another monitor, although a smaller one. If you like having more reference monitors, check out these open laptop desk setup ideas.
Stacked Laptop and Monitor Setup
If you don’t use a separate keyboard, you can stack your external monitor on top of your laptop. This way you can use your laptop’s built-in keyboard while enjoying the use of two monitors.

This is the exact setup my partner uses on a daily basis. It’s a great option for those tight on space and who don’t have room for their laptop plus a full-size keyboard.

With regards to ergonomics, this is the ideal form of a stacked setup. You should be tilting your head downwards more than upwards for the most ergonomic desk setup. (This recommendation comes straight from OSHA).
When your laptop is sitting on your desk’s surface, your stacked external monitor comes to eye level. No need to tilt your head upwards!
Laptop Stand Next To Monitor
I personally like using an external keyboard. They are much more functional and ergonomic. For this reason, I never got accustomed to the stacked laptop/monitor setup.
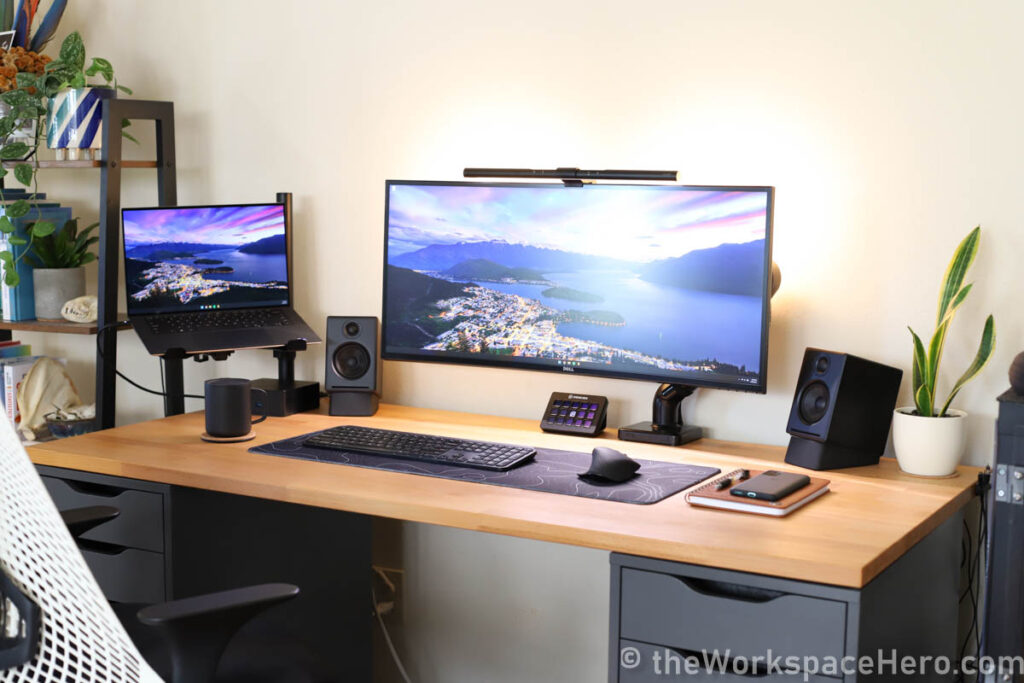
I more often found myself placing my laptop next to my monitor. One way to do this is by using a laptop stand. Here’s what my desk setup looks like with a laptop stand:

There is a good reason you would want to use a laptop stand instead of just placing your laptop on the desk itself. We discuss this in-depth in our article on why you should use laptop stands.
The main advantage of a laptop stand is it lifts your laptop screen to an ergonomic height.
Instead of looking down and to the side of your main monitor, you can just look to the side. This is a more seamless way of utilizing your laptop as a second monitor.
Laptop stands are also very affordable. Here is the laptop stand I am using in the image above:

- Holds up to 8.8 lbs.
- Fully aluminum body
- Clean design with centered support
- Large front lip with grippy base
- High friction hinge is still easy to adjust
- Not stable to type on

Laptop Arm Next To Monitor
This last option is the best open laptop and monitor setup in my opinion. It’s pretty similar to using a laptop stand, but it uses much less space.
Using laptop mounting arms can be a game-changing upgrade to any laptop desk setup. Laptop arms only clamp onto a small section of your desk to hold your laptop.

The result is a floating laptop that frees up a ton of desk space! You can see the difference in the image above on the desk space you need with a laptop arm vs. a laptop stand.
We compare laptop stands with laptop arms in detail here.
Here’s a quality gas spring laptop arm that can give you that much-needed extra space.
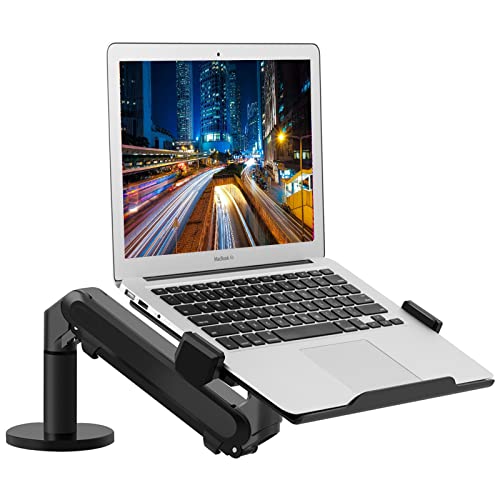
The laptop arm mount saves space, keeps your workstation organized, and promotes efficient multitasking. The 360-degree rotation feature provides complete flexibility to achieve the perfect viewing angle.
- Low profile design
- Gas spring actuated
- Laptop side supports
- 12-17" laptop compatibility
- High cost
If you are interested in a cheaper alternative, this laptop mount doesn’t have a gas spring but is less than half the cost. It also can hold your laptop up a bit higher.
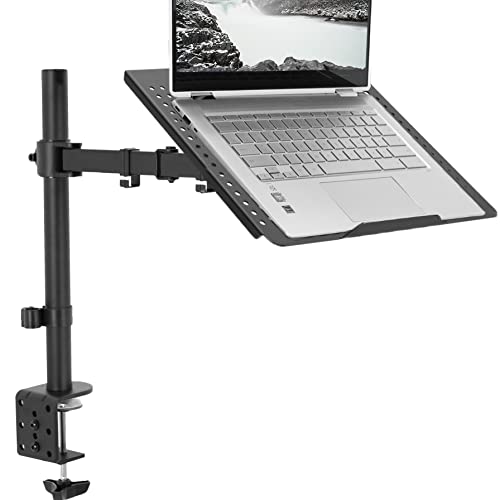
- Affordable price!
- Comes in white and black
- Supports laptops up to 17 inches
- Supports up to 22 lbs
- Clamps to desks up to 3.4" thick
- Subpar cable management
- Height adjustment requires tool
Closed Laptop & Monitor Setup Ideas
That brings us to our next set of laptop setup ideas: closed laptop desk setups. These setups are for those who just want to work off their external monitor alone.
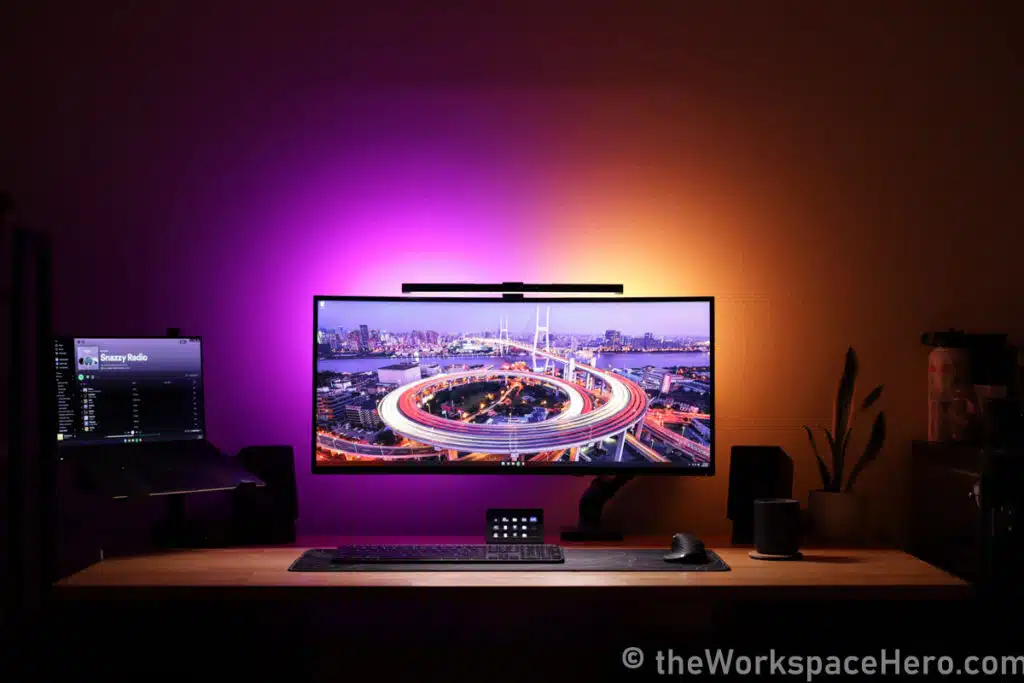
I have recently been using this type of setup because I have a 34″ ultrawide monitor. This gives me a lot of monitor real estate. I highly recommend ultrawide monitor desk setups.
I found myself not using my laptop screen for any serious productivity tasks. It would just have Spotify or some other program that would be fine in the background.
Closed laptop setups are great for people trying to get more space on their desks.
Vertical Laptop Stand Setup
One of the most space-efficient ways to use your laptop in the closed position is with a vertical laptop stand. It’s also a pretty attractive way to keep your monitor as it shows off your fancy Apple or Dell logo.
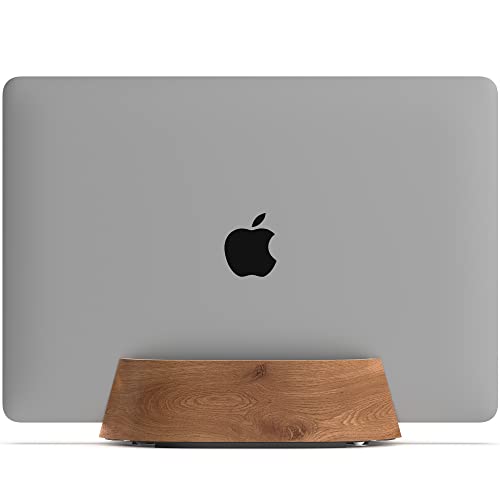
This wood vertical laptop stand saves desk space and has adjustable width for compatibility with most laptops and a sleek, minimalist design. The felt interior protects your device and the holder is weighted for stability and support.
- Adjustable width from 0.5 - 1.5 inches
- Minimalist design
- Protective felt interior
- Comes in leather & wood finishes
- Silicone base is grippy
- Pricey, but you get what you pay for
We have a dedicated article on whether vertical laptop stands are safe or not here. In summary, yes, they are perfectly safe. Just be sure you are not covering up your laptop’s vents.
Casual Closed Flat Laptop Setup
If you’re a simple guy or gal, there’s nothing wrong with just keeping the laptop closed and flat on your desk. Here’s an image of my desk with my laptop connected to a docking station.

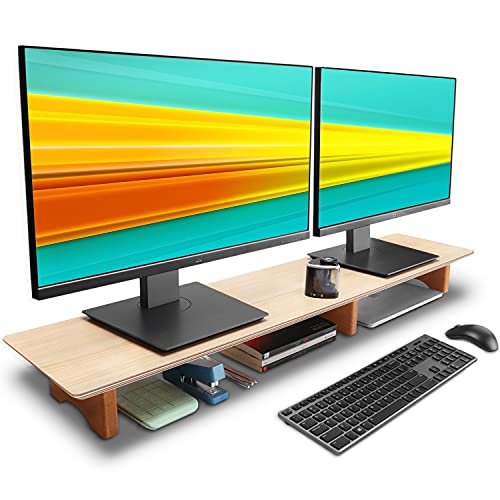
I’ve also recently added a desk shelf to my desk setup because desk shelves have their own benefits. These desk shelves are the perfect places to leave a closed laptop.
Below you can see my cheap Amazon desk shelf being used to organize my desk and also hold my laptop.

Here is the cheap Amazon desk shelf I am using:
- Comes in three wood grain colors
- Made with real poplar wood
- Supports up to 100 lbs.
- 43 inch by 9.4 inch surface
- Affordable compared to other wood desk shelves of the same size
- Cork legs are not the prettiest
Flat and closed laptop placement like this is by far the easiest way to ‘grab and go’ with your laptop. Simply unplug it and put it in your laptop bag!
Hidden Laptop Setup
If you don’t really go anywhere with your laptop, a really sleek desk setup is one where your laptop is hidden altogether. We have a dedicated article on ways to hide your laptop at your desk.
You can mount your laptop underneath your desk, to the side of your desk, etc.

One of the main problems with hiding your laptop is that you have a hard time accessing the power button.
In our article on how to get an external laptop power button, we talk about how factory Thunderbolt docking stations can do this for you! By factory Thunderbolt docking station, I mean Thunderbolt docking stations made from the same brand as your laptop.

They have proprietary methods to mirror the power button of your laptop. Hopefully, in the future, the Thunderbolt standard will make this compatible across all Thunderbolt devices.
How To Setup Your Laptop with a Monitor
Connecting your laptop to a monitor consists of a few simple steps.
Step 1: Connect Display Cables
If you’re connecting your laptop directly to your monitor, you simply need a single display cable. Find out what connections you have on your laptop and what connections you have on your monitor.
Here’s what different display connections could look like. VGA and DVI are pretty outdated at this point. HDMI, DisplayPort, and USB Type C are more common.
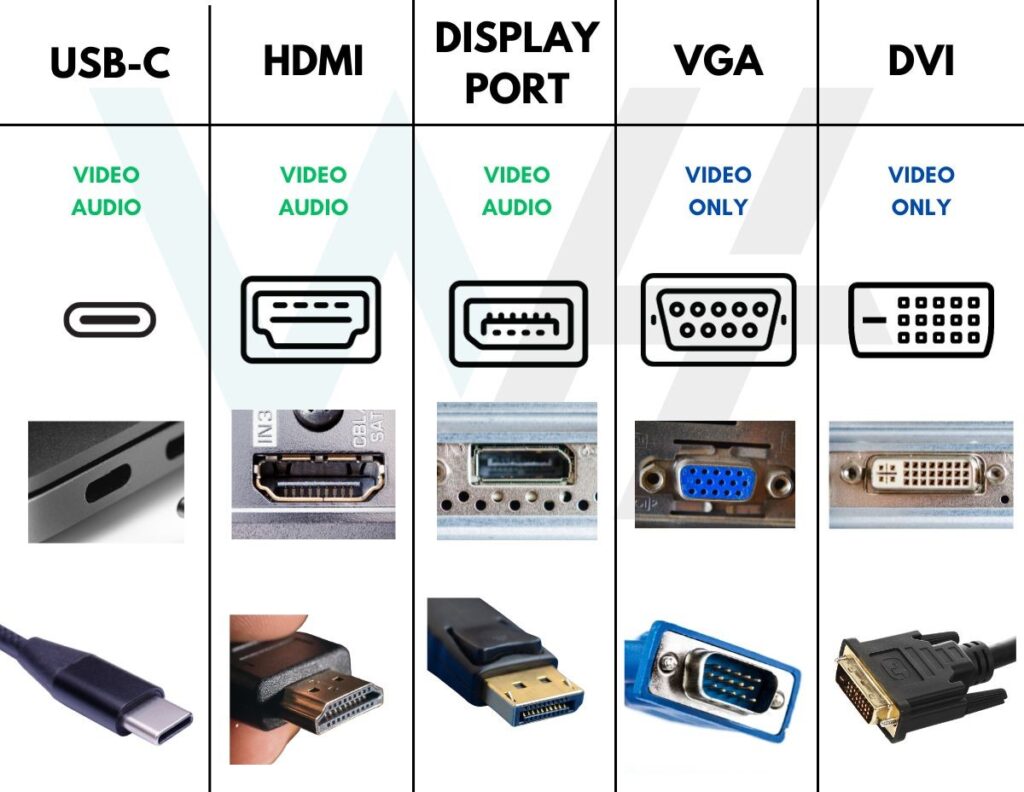
Find which connection type is both on your laptop and monitor. For example, if you see an HDMI port on both your laptop and monitor, use an HDMI cable.
But what if you only have a USB-C connection on your laptop and HDMI or DisplayPort on your monitor?
This is pretty common these days, as modern laptops mainly use a multifunctional USB-C standard. If this sounds like you, you’ll need a USB-C to HDMI adapter (or USB-C to DisplayPort). These can be purchased on Amazon for cheap.

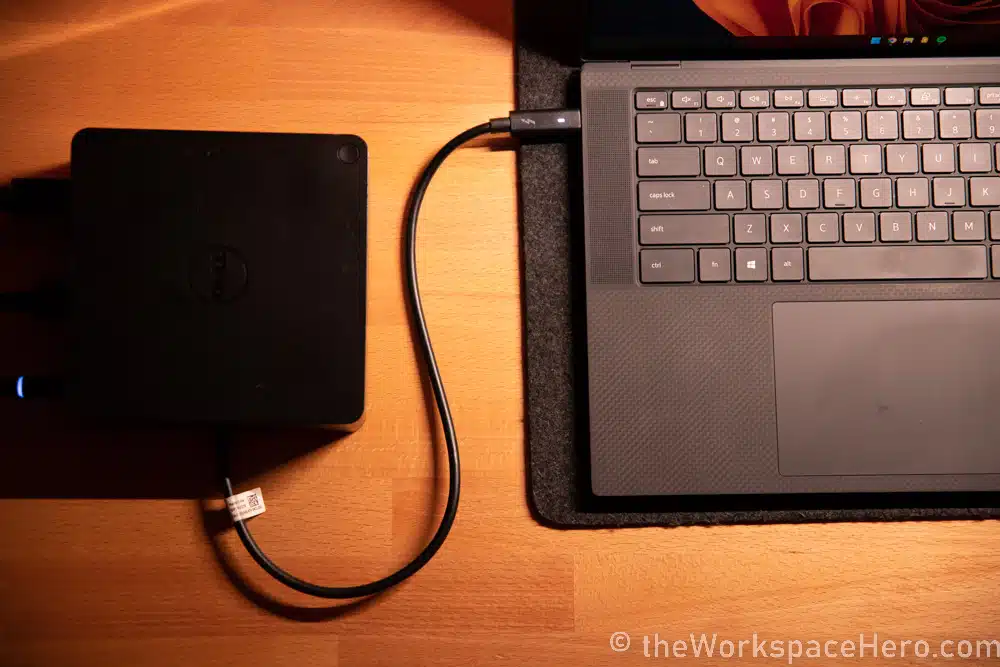
The image above is my Dell XPS 15 which only has USB-C ports. I use the old Dell TB16 docking station which gives me HDMI and DisplayPort connections for my monitor.
Step 2: Setup Display Configuration
After you get your laptop connected to your monitor, the next step is dialing in your computer’s settings.
If you want to keep your laptop closed, you have to tell your computer to only use your external monitor. If you want to keep your laptop open, you want to tell your laptop to extend your display.
Here’s how you can adjust your display settings on Windows laptops, and here’s how to do it on Mac laptops.
Use Docking Stations For a Perfect Laptop and Monitor Setup
You only really need a simple display cable to connect your laptop to your monitor. However, docking stations can make your laptop desk setup much more functional.
I am currently using the Dell TB16 Thunderbolt docking station, which is pretty old, but it does a ton of things for me.
With a single Thunderbolt cable going to my laptop, it can do the following:
- Connect to my ultrawide monitor via HDMI cable
- Connect a USB passthrough cable to activate my monitor’s USB ports
- Charge my laptop with power delivery at 130 Watts
- Connect to my Stream Deck (here’s why stream decks are great for productivity)
- Provide me with multiple USB ports, ethernet, three more display ports, etc.
When I need to take my laptop on the go, all I need to do is unplug a single cable. When you’re ready to work at your desk again, your entire desk setup gets hooked up with a single cable.
Thunderbolt docking stations are only compatible if your laptop has Thunderbolt connections. I recommend getting a dock from the same brand as your laptop because these docks can mirror your power button.
Here is an example of a highly-reviewed Thunderbolt docking station on Amazon:

Connect up to 18 devices with a single cable with the TS4's expansive connectivity. This supports powerful 98W charging and the ability to connect a single 8K or dual 6K 60Hz displays.
Perfecting Laptop Ergonomics in Your Desk Setup
Whenever people use laptops in their everyday desk setup, I always remind them to do the following:
Dial In Laptop Height
When your laptop screen is being used in conjunction with your monitor, you want to be able to glance at it quickly and frequently. When your laptop is placed at a weird height, this can lead to neck strain over time.
Unless you are using the stacked monitor/laptop setup, you should follow the normal monitor height guidelines when dialing in your laptop height.
This means that the top of your laptop screen should be at or below your eye level.
Don’t place it too low, however. You want the laptop screen to feel like a natural extension of your external monitor.

Optimize Laptop Distance
Laptop screens are smaller than normal monitors. Typical monitors start between 21 to 24 inches and can go up to 34 or even 49 inches diagonally.
Laptop screens on the other hand range are typically between 13 to 17 inches. When using this as a secondary monitor, you will be tempted to put it as far as a normal monitor.
You’ll quickly find that this means items on the monitor are a little harder to see. This is because the scaling of your laptop screen is designed for it to be sitting in front of you!
The solution here is to either bring your laptop a tiny bit closer than your monitor or adjust your display settings to scale up everything a tiny bit. Scaling your screen can help you use your second monitor more effectively.
Watch The Laptop Desk Setup Series For More Inspiration
Frequently Asked Questions
How To Use Dual Monitors with Laptops
To set up your laptop with dual monitors, look for two display outputs on your laptop. If you only have USB Type C ports, use a docking station or display adapter that can breakout multiple display ports.
Follow the above section on “How To Setup Your Laptop with a Monitor”. This illustrates what different display connections look like.
Here is an example of a USB-C hub that gives you multiple display outputs. Be sure to check compatibility with your laptop before purchasing.
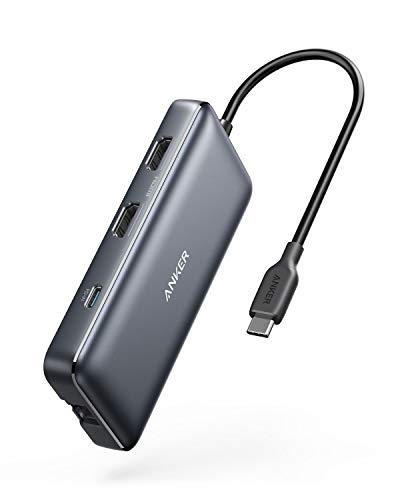
Get a big expansion of ports with this USB-C hub from Anker. Equipped with a range of functions, including dual HDMI display, pass-through charging, and more, all from a single USB-C port. Compatible with USB-C Power Delivery, this hub is a must-have for anyone looking for a single cable setup and breakdown.
What’s The Best Monitor Size to Pair With a Laptop?
The best monitor size depends on your needs, budget, and desk space.
After using an ultrawide monitor for a long time, I can’t see myself using any other type of monitor at the moment. But an ultrawide monitor might not be right for you.
Here are some rapid-fire recommendations:
- Basic budget-friendly pick– 24inch 1080p Monitor
- Productivity Ultrawide pick – 34″ 1440p Monitor
- High-Resolution Pick – 27″ or 32″ 4K Monitors
Can You Close Your Laptop While Using a Monitor?
Yes, you can leave your laptop close and use your laptop. You may have to go into your laptop settings to remind it not to fall asleep every time you close the laptop lid.
This is how folks who use all the closed laptop setup ideas use their computer.
Why Are Laptops Not Very Ergonomic?
Laptops are designed with a specific priority list for users. If I had to guess, this is what that priority list is:
- Functionality – get all the hardware to fit together and work together
- Portability – keep everything as small as possible while maintaining high hardware functionality
- Aesthetics – make the laptop beautiful and marketable so more people buy
- Ergonomics – make this tiny thing comfortable
Before laptop designers even think about ergonomics, they have to make the laptop so small and compact that the end result is not very ergonomic at all.
For an iPad, I really like these desk mounted tablet holders. Here’s an example: https://amzn.to/3QqCV9e
This is nice. What could I do if I have an ipad. I want to use that as an extra device. Do you have any ideas for that without laptop stand?