If you’re in the market for a new desk, it’s a good idea to have a general size in mind. This will allow it to fit in the space you have, fit in the budget you have, and just fit all your gear on top.
Today we’re going to be focusing on the depth of desks specifically. We talk about desk height in detail in a separate article here. I recommend reading that before you get a desk too.

Desks come in a bunch of different depths, so today we’re going to find out which one is right for you. We’ll touch on all the different depths that are available, what should influence your choice, and also how to make the most of any desk depth.
Key Takeaways
- The right desk depth depends on factors such as: what you keep on your desk, what space you have available, and what your budget is.
- If you find you’re restricted on desk depth, there are effective methods to get more room.
How Deep Are Typical Desks?
What options do we have to choose from anyway? According to our article on the average desk dimensions, the average desk depth is anywhere from around 20 inches to 30 inches. The most common depths are 19 inches, 24 inches, and 30 inches.
Here’s how you can measure your own desk and see what you are used to so you have a baseline to work with. Check out our article on how thick a desk should be. A larger depth might mean you need a slightly thicker desk to support the larger area.
So which one is right for you? Definitely don’t just blindly choose one. Taking some time to think about your requirements will pay dividends as you will likely use this desk for years to come.
Considerations To Determine Desk Depth
Here is what you should keep in mind when it comes to choosing the right desk depth.
What’s On Your Desk?
First and foremost, what’s on your desk? What you will want to fit on your desk will heavily influence the depth of your desk.
Specifically, think about what could possibly crowd in the depth direction. Do you usually have a full-size keyboard in front of you and a monitor? Or do you just have a laptop?
Do you rest your arms on your table when you type? How much space do your arms need? Do you need space for a desk shelf? A keyboard wristrest?

Try to emulate what is going to be in front of you, and give that a measure. Remember to give yourself some breathing room between the stuff that’s on your desk.
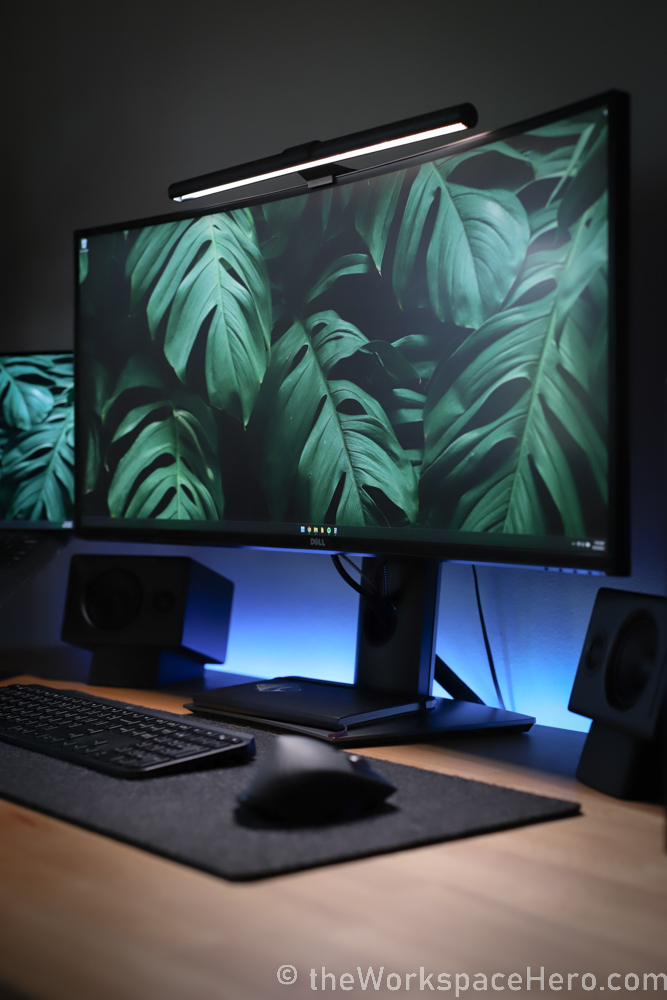
A 24-inch desk might be fine for most people, but I like having the space of a 30-inch deep desk. It all comes down to personal preference.
Don’t decide on a depth just yet. We have a few more considerations and a whole other section on how to make more small desk depths.
How Much Space Do You Have?
Sometimes the room we have available for a desk ends up restricting us. And it’s not always obvious.
Keep in mind how a deeper desk could take away room from your chair space. You definitely don’t want to restrict general movements.
It helps to actually put your chair in the space you have available. Then measure out what depth would give you some freedom of movement while being functional with what you have on your desk as well.
If you’re fortunate enough to have a ton of room for your next desk, you don’t have to worry about this part.
What’s Your Budget?
The cost of a desk generally goes up as you increase the size. So if all other factors are the same, a deeper desk will cost more than a narrow desk.
If you have a limited budget but want a deep desk, you will have to make tradeoffs in other areas.
Factors that can influence desk costs include the following:
- Tabletop Material (Solid Wood vs Engineered Wood vs Others)
- Length of Desk (Typical Options Range From 40″ to 80″)
- Desk Features (Drawers, Shelves, etc)
- Construction (Robust Desk Frames)
- Standing Desk vs Normal Desk
- Standing Desk Type (Manual vs Electric vs Dual Motor Electric)
Think about what tradeoffs you are willing to make so your desk fits into your budget. Rank these factors in order of importance to you. That’s a great way to get the best desk per dollar for your exact needs.
I typically start with size as my #1 consideration, personally. Then I see what everything looks like cost-wise in my size category. I simply rank them in terms of cost after that.
Get More Depth With Any Desk
If either your budget or your space available gets in the way of getting the deep desk that you want, don’t worry. We are going to talk about ways you can get the most out of your desk’s depth.
For those with already deep desks, these tips will give you even more room! More room means more activities!
Ditch The Factory Monitor Stand
I give this tip to pretty much everyone. Get rid of the factory monitor stand! They are usually very bulky and take up a huge amount of desk space directly in front of you. With a small depth desk, your monitor and your keyboard can easily take up all the depth you have available.
Before you rip the factory stand off the monitor, you have to make sure that your current monitor has VESA mounting holes.
When you look at the back of your monitor, you should either see a square plate that covers mounting holes, or you should see the mounting holes themselves. It’s a square screw pattern with a spacing of 75mm x 75mm or 100mm x 100mm.
If you don’t have VESA holes on your monitor, check out our article on how to mount monitors without VESA holes.

There are two types of monitor mounts you should consider.
Desk Clamp Mount
The first is a desk clamp mount. This is the simplest and the one that I recommend to most people. It replaces your factory monitor stand footprint with a small clamp.
This is the key in our guide on how to fit two monitors on super small desks.
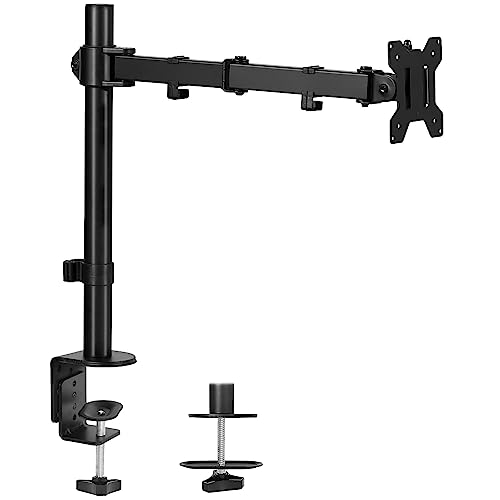
This single-arm mount fits monitors on the market between 13” and 32”, that weigh up to 22 lbs with VESA mounting. It offers adjustable height, tilt, and rotation for flexible viewing angles and integrated cable management for a clean setup.
The footprint is reduced dramatically, so you have more usable depth on your desk. If you have a particularly thin or weak desk, we have a guide on how to safely use monitor mounts on those types of desks.
Wall Mount
What about having no desk footprint at all? That’s exactly what wall mounts offer. Most people have their desks up against a wall, so this is pretty functional.
If you want to wall mount and your monitor doesn’t have VESA holes, we have a guide on how to mount monitors without VESA mounting holes.
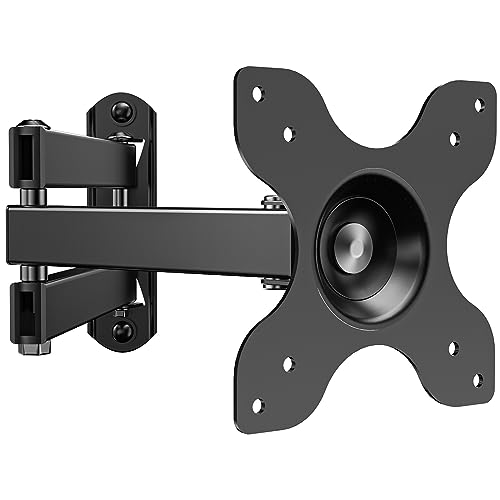
This heavy-duty wall mount is compatible with most 13 to 32-inch flat panel displays and is adjustable for viewing flexibility. It places the TV just 2 inches from the wall and extends up to 15 inches. The wall mount plate can be mounted on any vertical wood studs, brick, or concrete walls.
If you rent the room you are staying in, then this might not be the best solution. This requires some drilling into your wall studs. However, if you have your desk in a semi-permanent location in your own home, it could be a fantastic solution.
When you wall mount, you pretty much don’t give up any desk space at all. Your monitor can be pretty flush with the wall. It’s a very space-efficient solution.
Not to mention that your monitor looks like it’s floating in mid-air with magic.
Keep Larger Items Off Your Desk
Now that we got rid of one large item off of our desk, let’s move on to the next large item. Hiding a few large items on your desk can make a world of difference.
Computer towers can be huge devices, but they are critical to our workspaces. I have a dedicated guide on hiding your computer tower. Figuring out a solution to hiding your computer will give you some serious breathing room.

We also have a guide on hiding your laptop if you use an external monitor, and even hiding that docking station. Taking the time to functionally hide these items will give you a lot of that desk depth back.
Wall Mount More Things!
Wall mounting a monitor is a serious task that involves drilling into your wall’s studs. But not all wall mounting is that bad. Especially lighter objects.
If we are limited on desk depth, we should strive to wall mount more stuff. That’s where grid wall organizers come into play.
These are super modular storage systems that mount on your wall and can hold all types of things. They can hold headphones, commonly used cables, and even a book you are currently reading.
Remember when I said no drilling? Using command strips with this solution gives you a high-strength wall mount that requires no tools and literally leaves no trace.
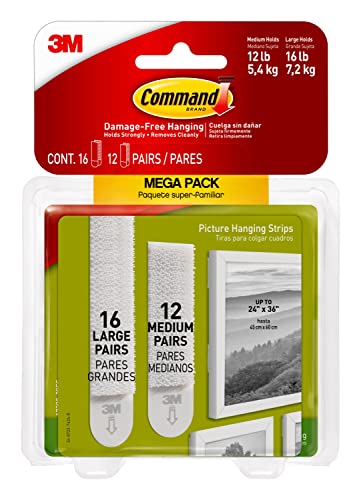
This variety pack includes 12 pairs of medium and 16 pairs of large hanging strips that work on a variety of smooth surfaces. Clean the surface with rubbing alcohol before use and wait seven days after attaching it to a freshly painted wall.
If you plan on loading your wall organizer heavily, use more command strips to make the hold even more secure. Just follow the instructions on how to remove them. When you remove them correctly, there is no trace that anything was ever wall mounted!
They are a perfect affordable solution to wall mounting anything, a great solution for those that rent their places!
If you want some inspiration, here are some fantastic setups that use wall-mounted grid organizers.
Notice how much space these setups have on their desk? They don’t seem limited on desk depth!
Consider A Minimalist Setup
The last recommendation here is to try to have a minimalist setup. If you followed some of the recommendations above, those are core concepts of a minimalist desk setup.
We have a dedicated article on how to set up a minimalist desk.
Ever since my desk setup became much more minimal, I naturally have way fewer distractions on my desk. It really helps me get stuff done. I actually made having a minimal desk setup one of the principles in our guide on a productivity-focused desk.
All this entails is removing or re-locating anything on your desk that is not used every time you’re at your desk. It also involves ideas like cable management to remove eye sores which in turn make your desk a super inviting place to work.
Most importantly, the more minimal your setup, the more desk depth you have to yourself.