Dedicated microphones are very useful in the world of remote working, streaming, and gaming. They give you terrific audio quality at a fairly inexpensive price.
When it comes to mounting these microphones, it’s one thing to find the right placement, and it’s another thing to actually clamp it down. Especially when it comes to all the differently-shaped desks out there.
In this article, we’re going to help you attach your microphone boom arm to your thick desk.
Key Takeaways
A few easy ways to attach a mic boom arm to a thick desk include using larger clamps, using screw-mounted bases, mounting to nearby furniture, or even wall mounting.
You can also change the base to a weighted desk stand or even a floor stand pretty easily.

The Thick Desk Boom Mounting Issue
Most microphones that have a boom stand also have a desk clamp at the end. This is to simply clamp onto one free edge of your desk.
It works on most tables that have an edge and a thickness of less than 2 inches. For example, here is the best seller at the time of writing on Amazon.
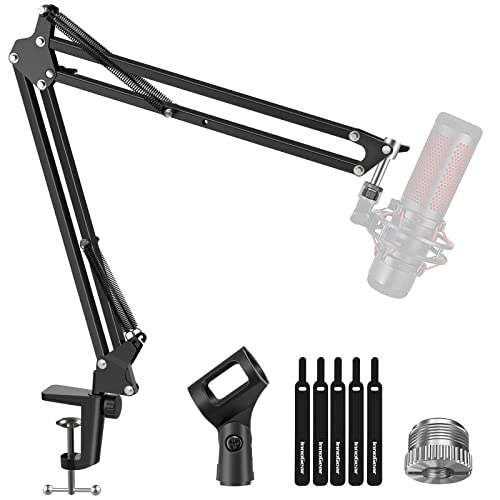
Upgrade your mic setup with this fully adjustable, heavy-duty microphone stand that provides effortless and silent microphone positioning on desks up to 2 inches thick. This mic stand has a decent load-bearing capacity of 1.5kg.
This clamp works with desks up to 2 inches thick. The Amazon’s Choice listing below also has a desk limit of 2 inches thick.

This flexible and durable microphone stand can fit desks up to 2 inches thick. The built-in spring balance system provides stable movement. With a heavy-duty base and fixing screw, this stand is both stable and secure.
The problem here is that desks come in so many different shapes and sizes. Not all desks have an exposed ledge that is under 2 inches thick.
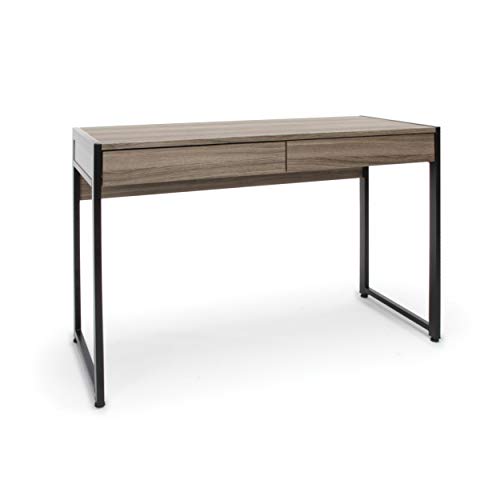
Take the desk below as an example. This happens to be a very thick desk surface as it comes with integrated drawers. There is no straightforward way to attach a small 2-inch clamp here.
Thick desks are always running into this problem. So how do you attach a mic arm mount to a super thick desk like this? We get into a couple of solutions below.
By the end of this article, you should have a good idea of what mounting method is best for your situation. Let’s get that mic mounted.
Thick Desk Mounting Solutions
Not all of these solutions are for everyone, but because there is a decent variety of solutions, you should find one that works for you.

Try Larger Clamps
The first solution here is to try finding a larger clamp that actually fits your desk. This is for those of you that are barely not able to fit your mic arm onto your desk. It is the simplest option out there.
Most mic arms have a removable stand, which means you can replace them with a better version!
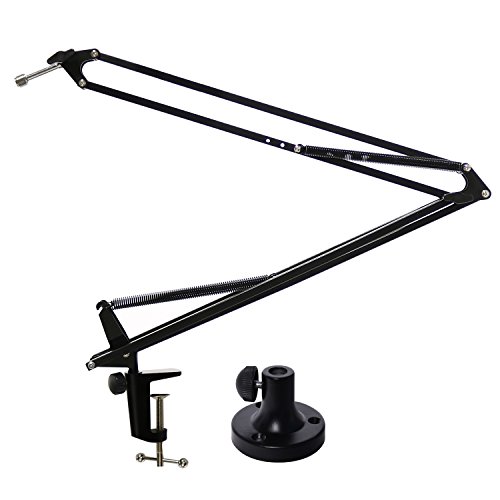
This fairly large clamp size on Amazon is able to open up as large as 2.76 inches! That is almost a full inch larger than the other popular options on the market.

Use your microphone boom arm with this versatile assembly clip that can be table mounted. With a heavy metal desk clamp, it prevents slipping and mic movement. This clamp supports desks up to 2.75 inches thick.
Consider Semi Permanent Mounting
Just because most mic arms come with a clamping base doesn’t mean you have to use that clamp. Especially when it’s impossible on a thick desk.
Those of you with a brand-new or expensive desk might not like this idea very much. But you can semi-permanently screw your mic arm stand into your desk.
You simply use a screw-mounted base like the one that comes with this mic boom mount:
Screw mount your microphone stand with this stand that's perfect for the home office. With two mounting options, you can either screw mount this directly to your wood desks or use the included clamp mount for desks up to 2.5 inches thick.
If you are confident in a specific boom arm mounting position, and you don’t move stuff around very much, this is a solution worth considering.
It actually looks much better than a large metal clamp extending on the outside of your desk.
Also, if you do want to move your mic to a new location, you just have three small holes towards the back of your desk.
Three small holes will be easy to patch or even cover up with a small plant, a book, or a coaster. If you have a solid color desk, it will be simple to fill and re-paint your desktop to make it look new again.
This is not as scary of a solution as some people make it out to be, especially if you are thinking long-term.
I understand if you just got a new beautiful desk, you probably don’t want to drill it. The same is true if you have a beautiful antique desk. This solution is not for everyone.
Mount Elsewhere, If Possible
Maybe you don’t have a desk that is the right thickness. But do you have anything else around you that has the right thickness?
This could be your metal desk frame, some nearby shelves, or a bookshelf next to your desk.
It just has to be something under 2 (or 2.76) inches thick and be fixed firmly in place. Don’t clamp it onto anything that is flimsy. You want a reliable place to clamp your boom arm.
Mic arms are pretty large and sometimes heavy, a sturdy mounting position will make adjustments and such much easier.
Consider Wall Mounts
If you don’t want to screw your mic into your precious desk, consider a wall mount!
Desks are typically pushed up against a wall, so a wall mount is very practical. There is also a lot more vertical positioning freedom when mounting on the wall.
Another huge advantage of mounting on the wall instead of your desk is sound isolation. When you are working or gaming you’re constantly moving your hands around, typing, and making noise.
Your noises on the table can resonate with your mic’s boom stand. A wall mount isolates your desk completely! You actually might get better audio performance when you wall-mount your microphone.

This wall mount adapter is a space-saving solution that installs your existing microphone boom arm on the wall, freeing up your desk and providing a stable, firm hold for your microphone. Made of aluminum alloy with a triangular support base, it's more durable than desk clamps and comes with sponge pads to protect both the product and the wall.
Lastly, these install onto your drywall. Drywall is very forgiving in terms of wall repair. Simply fill and paint!
Another benefit is that you get some table space back when you use your wall instead of your desk to mount your microphone.
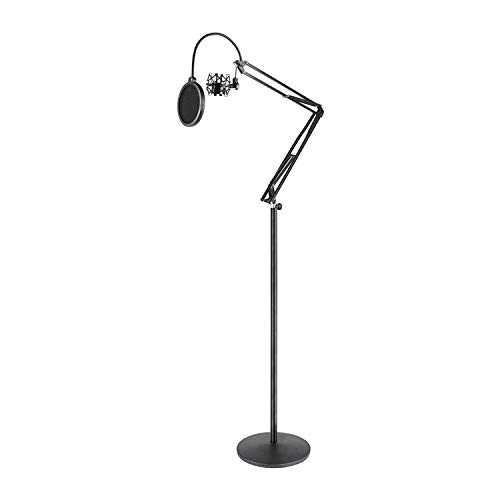
Weighted Desk Stand
Now we are starting to get into the solutions that have some compromises.
If you have absolutely no way to use any of the clamping and mounting ideas we already discussed, it’s time to consider free-standing or standalone options.
A weighted desk stand is a simple mic stand that just uses a heavy base to keep your microphone in place.
The InnoGear desktop microphone stand has a heavy-weighted base and extendable boom arm, providing straightforward stability and adjustability for microphones up to 4.4 lbs.
They are not super ideal because they can still move around a bit. But they involve zero drilling or awkward clamping.
Simply take this out of the box and place it on your desk. That’s all for the setup.
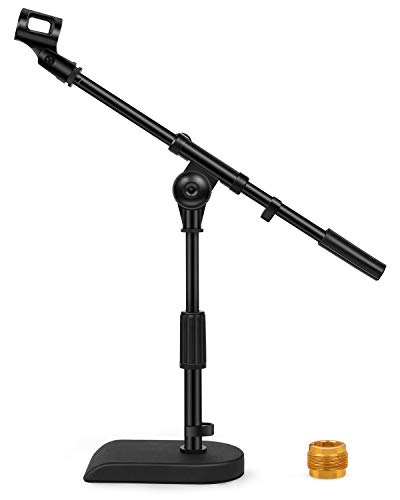
Weighted Floor Stand
The last solution here is floor mounting your microphone boom stand.
Desk space is very valuable, especially if you have a smaller desk. If you originally wanted to use a small desk clamp it would be pretty disappointing to have a huge weighted desk mic stand taking up your desk space instead.
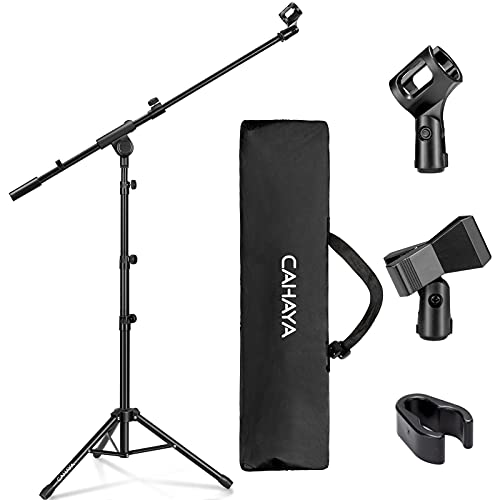
This tripod boom microphone stand sits on the floor with an adjustable height and extendable, tripod base. The removable boom arm provides easy positioning. It comes with a carrying bag and 2 mic clips and can be converted into a traditional straight mic stand.
Weighted floor mounts are the last resort here. We say last resort, but they are actually great solutions.
They isolate your desk vibrations from reaching your microphone and can be placed pretty much anywhere. You have much more flexibility in adjusting the microphone’s location.
Once you’re done setting up your mic, check out our dedicated article on cool headphone stands you can make yourself.
Why Use Dedicated Microphones?
Good headphones that come with good microphones are a very expensive combo. Your laptop likely has a microphone that was designed with a focus on size, not audio quality.

Dedicated microphones are designed with only one thing in mind: high-quality voice audio. Whenever you buy items that are purpose-built, 9 times out of 10, you get a better product compared to a combo product.
Good microphones alone are comparably cheap and give you fantastic audio quality.
As a result, you get a huge jump in audio quality with a dedicated microphone. It just happens that boom arms are a very convenient way to mount the mics to your desk.